WhatsApp Business Platform Campaigns allow you to automate sending messages to a specific “Segment”, while ensuring personalisation, control, and traceability. Scheduling allows you to choose the most opportune time to reach recipients, improving the effectiveness of communication and optimising the work of recruiters.
In this article, we will look at what WhatsApp Campaigns are in Inrecruiting, how to schedule them, and why they are an increasingly central tool for improving candidate engagement and making selection processes more efficient.
From the side menu WhatsApp > Campaigns, the company user can view existing WhatsApp Campaigns and create new WhatsApp Campaigns.
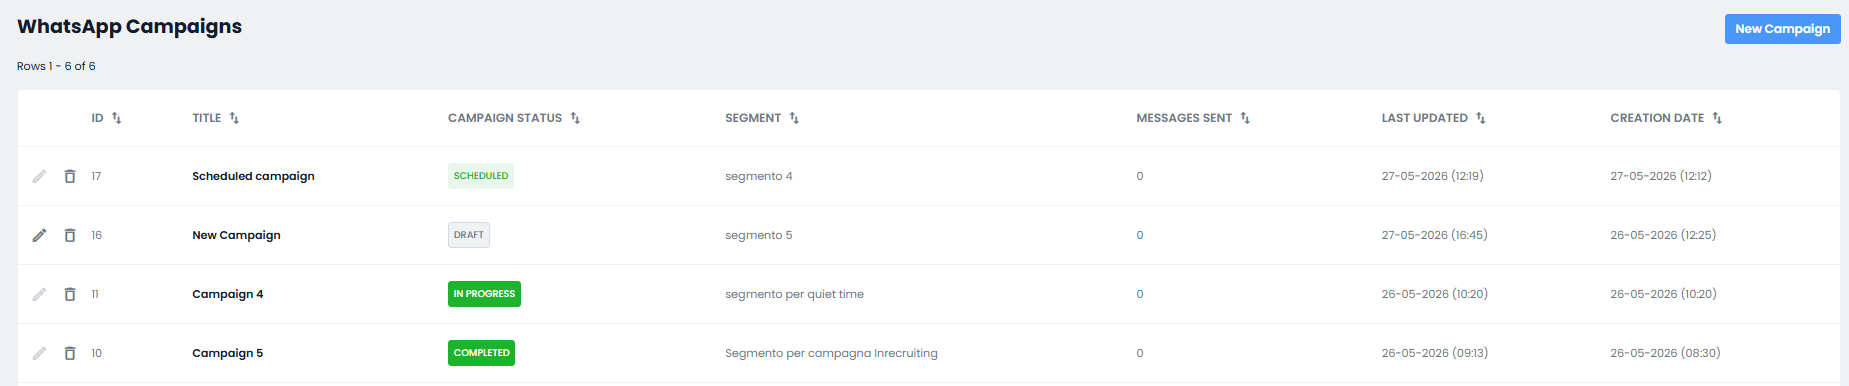
For each campaign in the list, the following details will be shown:
Campaign ID
Title: campaign name
Campaign status:
Segment: name of the associated recipient segment
Messages sent: number of messages sent
Last modified: date and time of the campaign's most recent changes
Creation date: date and time the campaign was created
WhatsApp Campaign Configuration
Whether adding a new campaign (by clicking the New Campaign button) or editing an existing one from the list, the company user will need to configure the following Campaign Settings:
-) General
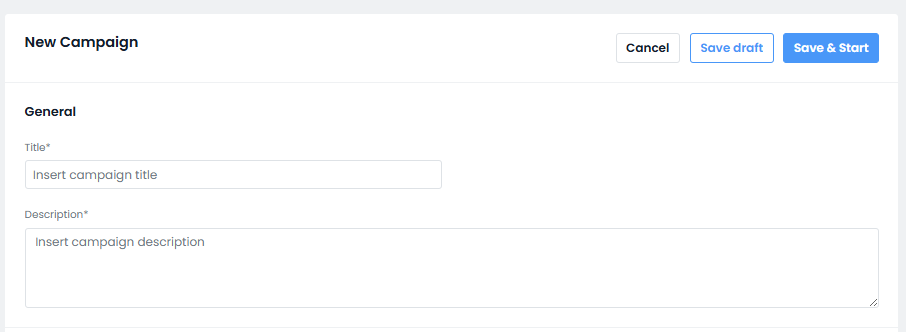
In this section, you can view or configure the campaign Title (mandatory) and a Description (optional).
This information will not be displayed to candidates, but it is used for internal tracking by company users.
-) Segment and template
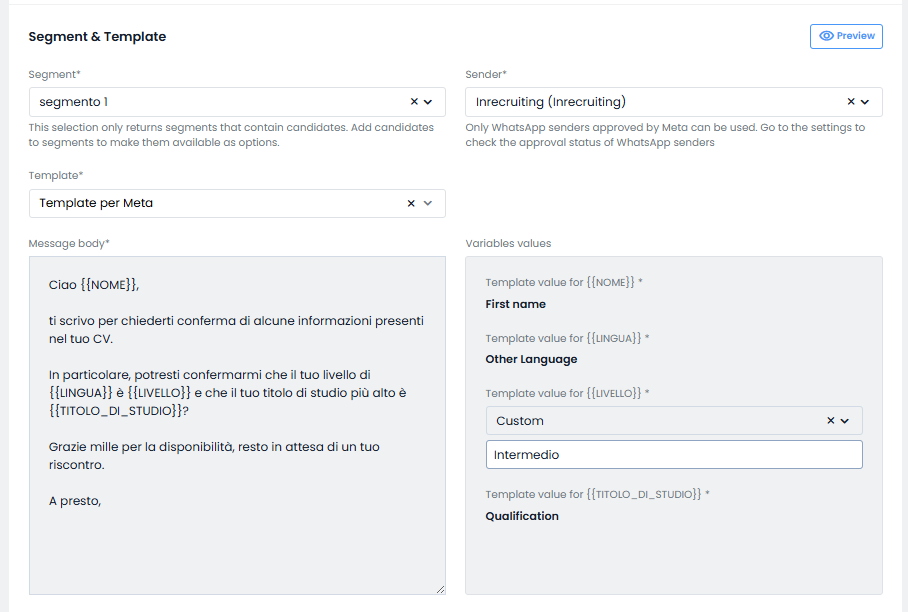
In this section, the company user must choose one of the previously created segments to use as the recipient Segment for the Campaign.
From the Sender field, they must choose which of the company's WhatsApp Sender numbers to use as the campaign sender.
From the Template field, they must choose a Template from the Meta-approved templates available in the WhatsApp Templates section.
The body of the selected message will be displayed in the Message body panel.
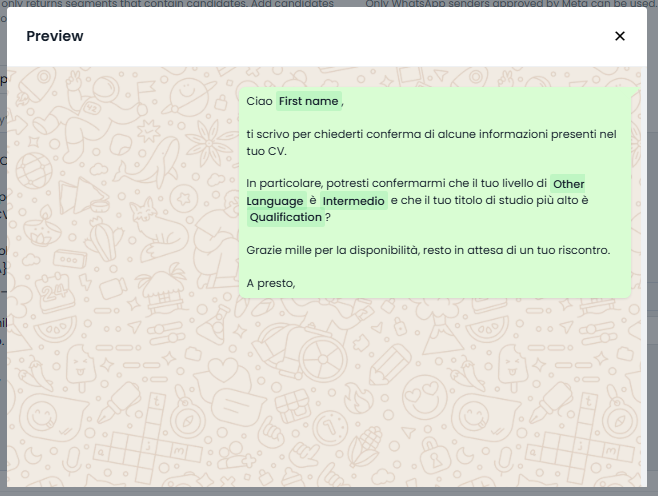
By clicking the Preview button in the Message section, the company user can view a sample message preview.
-) Campaign scheduling time settings
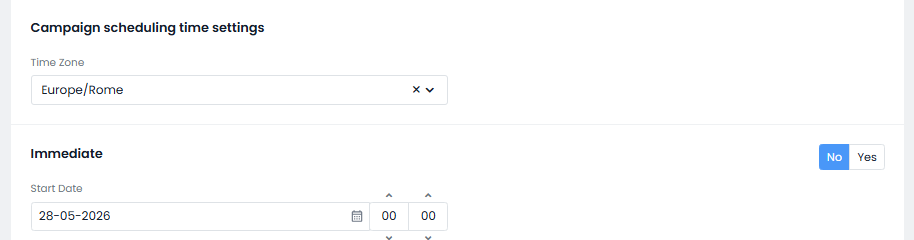
In this section, the company user must configure the time details for both the general Timezone settings and the specific time settings regarding the campaign's start.
Two sending types can be configured: Immediate or scheduled.
If the option to schedule for a future time is chosen, the company user must set a start date and time for the campaign.
-) Quiet Time
Here, the company user can configure the time interval during which the system will not send bulk WhatsApp messages, in accordance with company policies.
Confirming Send Configurations and Saving the Campaign
Once the company user has completed the Campaign configurations and wishes to lock them from further editing, they can confirm them by clicking the Save and Start button.
Error details screen
In this error details view, the company user will see a list of all recipient candidates with candidate fields in error (i.e., not present/filled in correctly on the candidate form, but set as required for the correct population of the campaign template's variable fields).

The company user must then correct the errors by manually editing the candidate fields flagged as “in error”, and then retry sending.
Alternatively, they can remove the recipient candidates with errors from the segment by clicking the Go to segment button and clicking on bin icon next to the candidate's name.
After making the necessary corrections, the company user can return to the campaign configuration page by clicking the Return to campaign edit button and try again by clicking the Save and Start button.
Was this article helpful?
That’s Great!
Thank you for your feedback
Sorry! We couldn't be helpful
Thank you for your feedback
Feedback sent
We appreciate your effort and will try to fix the article