In the Welcomin system, each Workflow is made up of steps — individual activities or content items that guide the user through the process.
These steps may include filling out forms, viewing multimedia content, reviewing documents, and signing them digitally or with a scanned signature.
Configuring Step Content is essential to tailor workflows to your company’s specific needs.
By navigating to Settings > Workflows > Content Configuration > Workflow Steps, you can define which information to collect and which documents to display for viewing or signing.
On this screen, you can view the list of steps created so far:
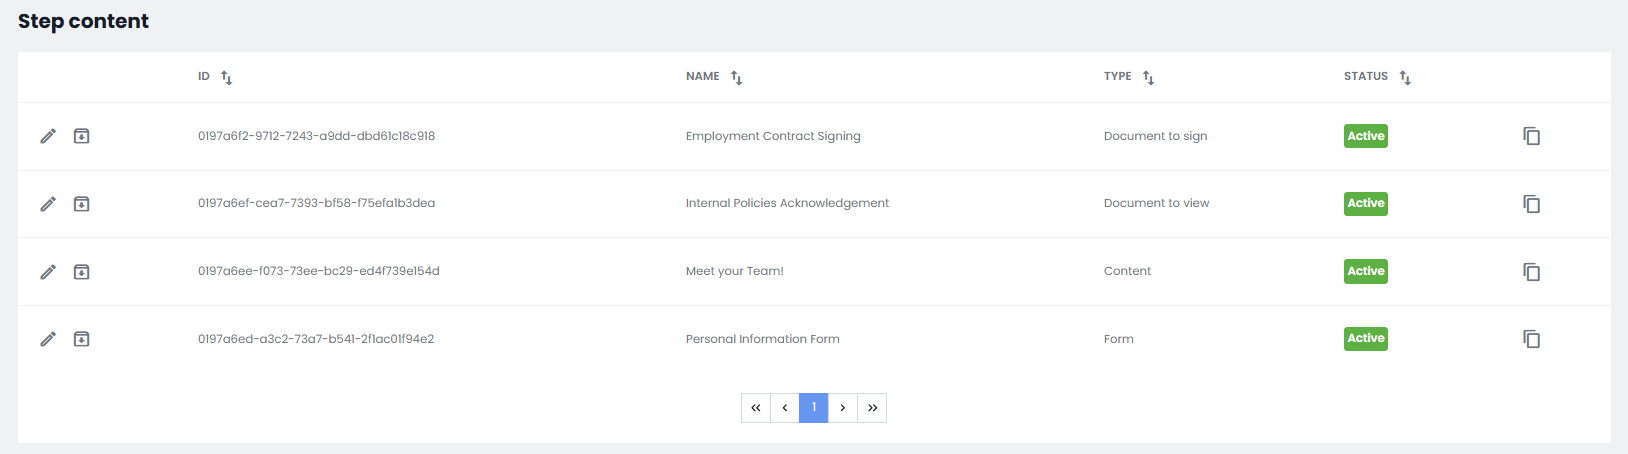
By clicking on the pencil icon, you can edit them, while clicking on the  icon allows you to archive the step.
In the Type column, the type of Step created will be shown. This column can be used to sort the display of Steps, making workflow management and organization easier.
To create a new Workflow Step , simply click on Add Step at the top right and select the type of Step Content you wish to create:

- Form
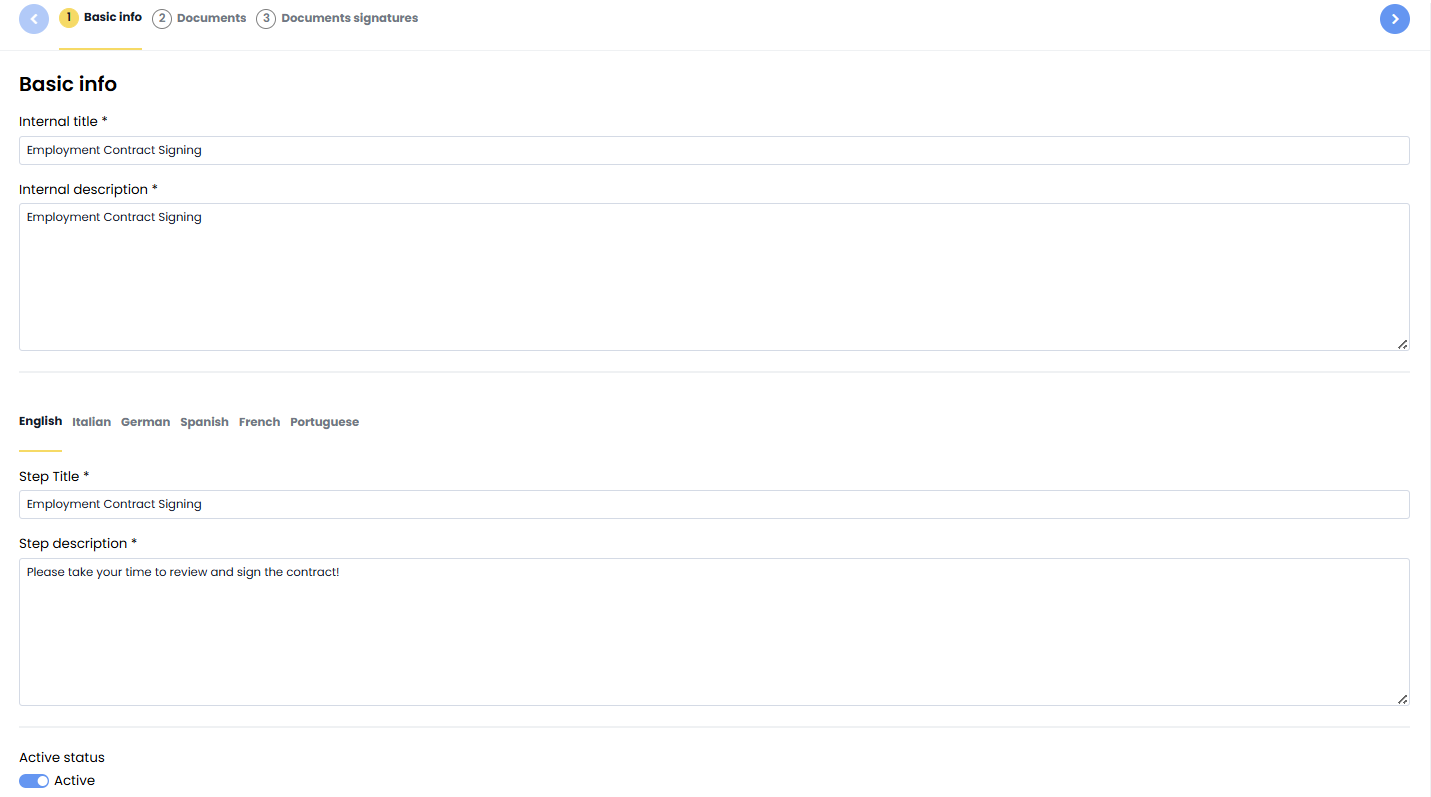
In the first tab, you’ll need to specify the internal title and description, which will not be visible to the user. Then, define the step title and description, which will be shown to the user. Finally, the Active Status checkbox at the bottom of the tab allows you to activate or deactivate the step.

In the second tab, you can define the fields the user must complete. For each field, you can specify whether it should be active in the form, pre-filled with existing user data, and whether it is mandatory.

- Content
As in the first tab above, you’ll need to specify internal and external titles and descriptions, distinguishing between those visible to the user and internal ones. You can also determine whether the step should be active.

In the second tab, you can add multimedia documents to share with the candidate. You can insert text to display, or link a video or image for the candidate to view.

After completing the tab, simply click Save at the top right to finalize the operation.
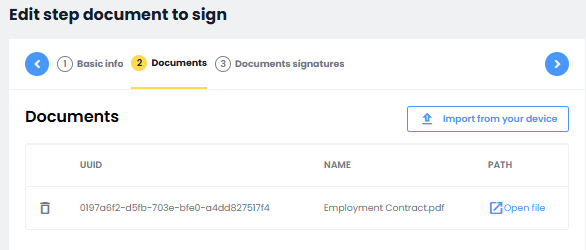
- Document to Sign
Again, in the first tab, you’ll specify internal and external titles and descriptions, as well as the step’s activation status. Then click Save and Continue at the top right to proceed to the next step.
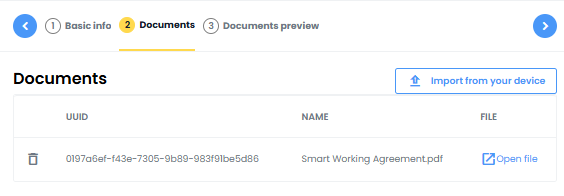
In the Documents tab, you can upload the documents to be signed by the user. Just click Import from device.

At this point, in the Document Signatures tab, you can drag the fields from the right side into the document on the left, allowing the empty fields to be filled with the user’s previously entered information. Proper placement ensures accurate and consistent completion.

Similarly, you’ll need to indicate where the digital signature should be placed. By dragging the User Signature field to the desired area of the document, the user will be automatically redirected to the external service to complete the digital signature upon clicking.
![]()
Once this step is complete, clicking the Close button at the top right will finalize the configuration.
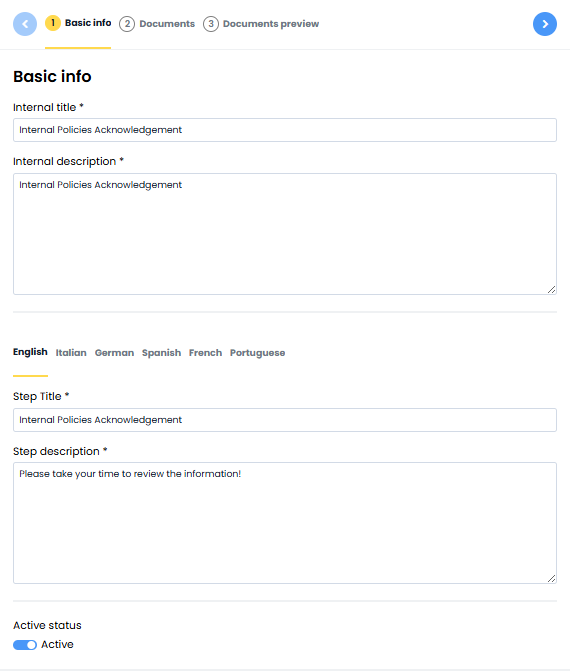
- Document to View
As with the previous steps, in the first tab you’ll need to specify internal and external titles, descriptions, and determine whether the Step Content should be active.
In the Documents tab, you can upload the document to be shown to the user.

In the Document Preview tab, you can view a preview of what will be shown to the user. In this phase as well, you’ll use drag and drop to place fields so that the information is automatically filled in with the user’s previously entered data.

Was this article helpful?
That’s Great!
Thank you for your feedback
Sorry! We couldn't be helpful
Thank you for your feedback
Feedback sent
We appreciate your effort and will try to fix the article