In the Welcomin system, the term Persona refers to the new hire — someone who has been selected to join the company but has not yet officially started their employment journey.
This individual is involved in a series of preliminary activities that take place before their first day of work, with the goal of facilitating onboarding, simplifying administrative procedures, and creating a positive first connection with the organization.
Through Welcomin, the company can digitally and systematically manage all the steps leading up to the new employee’s official start date — such as collecting documents, sharing useful information, signing contracts, or introducing the team.
This approach helps enhance the new hire’s experience from the very beginning, strengthening their sense of welcome and belonging.
By accessing the People section via the sidebar, you can manage all aspects related to employees.

By clicking on the person’s name, you can access their profile and view the information they have entered.
You will find the Personal Detail tab, where you can view the individual’s personal details.

At the top of the page, you’ll find the General section, which displays the username.
Below that, you’ll see the account information, including:
- First Name
- Last Name
- Personal Email
- Mobile Number

Continuing on, you’ll find the Personal Data and Other Information sections.
All fields within these three categories — as well as the categories themselves — are customizable by accessing the Profile Form in the Settings.
 Finally, in the last section of the tab, you can assign divisions to people.
In the Workflow tab, you can see the list of workflows sent to the person and track the progress of their completion.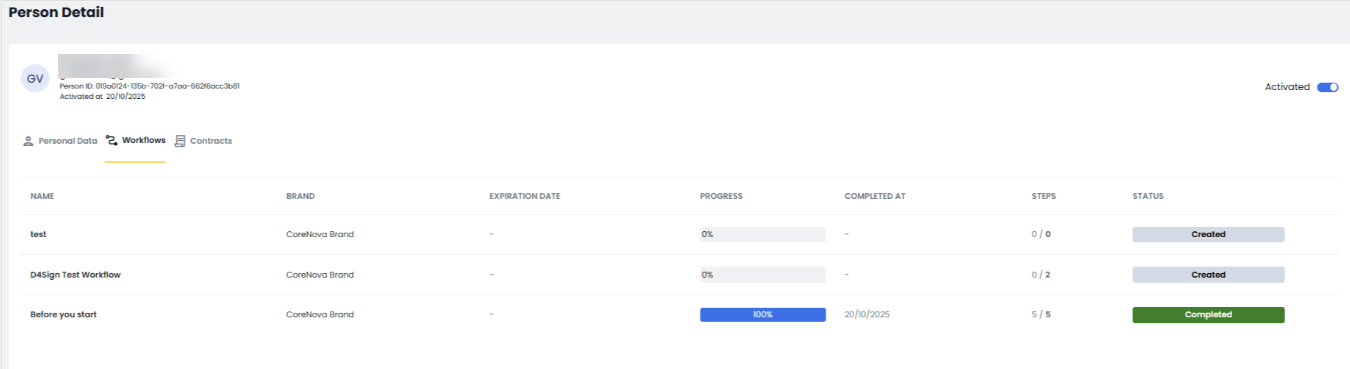
In the first column, the workflow name will be displayed, in the next one the Brand, while in the following column you will be able to view the workflow expiration date.
Continuing on, there will be columns showing the completion percentage, the completion date, the number of completed steps, and the final status — whether the workflow has been completed or is still in progress.
In the Contracts tab, finally, you will find the list of contracts signed with the candidate along with the related details.

To add a contract, you’ll need to click on Add Contract located in the top right corner: at this point, two screens will open, which you’ll fill in with the contract details.
If you wish to deactivate the person’s profile, simply click on the corresponding flag in the top right corner.

From the list of people, it will also be possible to see whether the person has activated their account: if the account has not been activated, an indication will appear next to the name.

In the first column, you will see the person’s name, email address, and profession. By clicking on the person’s name, you will be redirected to their profile.
In the second column, you will find the office location of the contract. If there are multiple contracts for the same person, they will be displayed with a tooltip. If no contract is present, the message “no office assigned” will appear.
In the Status column, you will find a label indicating whether the candidate is Incoming, Active, or Terminated. If there are no contracts, this column will remain empty.
The Contracts column, if it contains only one entry, will show the contract title, type, and start/end dates. If there are multiple contracts for the same person, they will be displayed with a tooltip.
Finally, you will see the number of workflows the person has been invited to. By clicking on the
number, you will be redirected to the person’s profile page, in the Workflows tab.
In the last column, there will be a button that allows you to invite the person to a workflow. By clicking it, a window will open where you can select and define the workflow to be sent to the person.

From this screen, it will also be possible to import people in bulk or create a new person using the dedicated buttons located at the top.
 By selecting the "Add new" option, a window will appear on the right side of the screen.
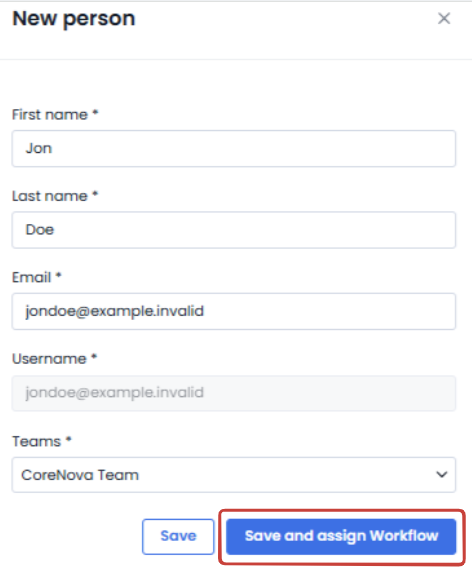
In this window, you will be able to enter the first name, last name, and email address of the new person.

By clicking the "Save" button, the person’s account will be automatically generated.
If, instead, you wish to create the account and simultaneously send an invitation to a workflow, simply click the "Save and assign to workflow" button.
When a person is invited to a workflow, they will receive a notification containing a link.
Through this link, they will be able to set a password to activate their account and access their personal area.
Clicking "Import People" will open a window where you can upload your CSV file or download a template to help you correctly format your data for import.

Once the file is uploaded, the system will automatically import the people.
As indicated in the message, you will receive an email at the end of the import process with the results, including any errors encountered.

Was this article helpful?
That’s Great!
Thank you for your feedback
Sorry! We couldn't be helpful
Thank you for your feedback
Feedback sent
We appreciate your effort and will try to fix the article